Designer
Through the Designer section, you can access all information about existing microservices, such as the author, script, execution dates, problem it solves, or license type; but most importantly, it allows you to create new microservices.
Microservice creation
Microservices are created in four phases:
Phase 1
- Access
Portal->Microservices->Designer. - Click on
New. - The wizard will open, asking to enter the following information:
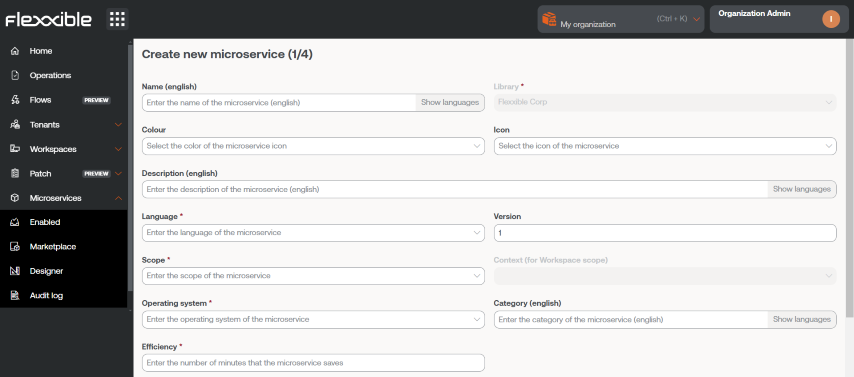
- Name. Enter the name of the microservice.
- Color. Microservice icon color.
- Icon. Microservice icon type.
- Description. Brief text explaining what the microservice does.
- Language. Programming language it is developed with.
- Version. Microservice version number.
- Scope. Execution scope. You can select Workspace (context System or Session) or Platform.
- Operating system. Operating system it is designed for.
- Category. Directory or group of microservices accessible from Workspaces where this microservice will be hosted.
- Efficiency. Number of minutes the microservice saves with each execution.
- Click
Next.
If the microservice is to be used as an end-user microservice, the name of the microservice should not contain special characters (such as \ / : * ? " < > and other language-specific characters for certain keyboard layouts).
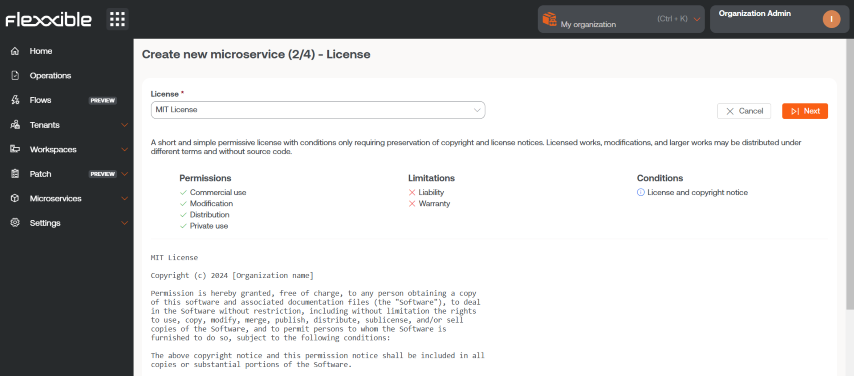
Phase 2 - License
- Choose from the dropdown options the type of license the microservice will have.
- Click
Next.
Phase 3 - README
- Insert a description of the microservice in Markdown format.
- Click
Next.
To set a title with Markdown, simply start the line with # Title. Here are some examples of its syntax:
| Item | Markdown Syntax | Preview |
|---|---|---|
| Bold | **bold** | bold |
| Italic | *italic* | italic |
| List | - List item | - List item |
| Link | [text](url) | text |
| Image |  |  |
| Code | `code` | code |
| ::: |
Phase 4 - Script
- Enter the script.
- Click
Next.
The created microservice will appear in the main table of the section.
Code
Although microservices allow the execution of any CMD or PowerShell command on Windows devices, the sent commands will be executed from the local administrator or the user session, depending on the assigned scope. This may mean that some cmdlets do not have the expected output in relation to the execution performed. For that reason, if you are creating a script in PowerShell you should keep a series of considerations in mind:
-
It is recommended that the installed version of PowerShell on the devices is the same as the one used to develop the microservices.
-
The microservices can be executed under the user session identity or from the local administrator.
-
Execution from the local administrator: in
Scopeyou can configureWorkspacesorPlatform, which greatly facilitates interaction with processes, services, and acting with administrative permissions on the device, but may complicate accessing specific user information or their session. -
Execution from user session: in
Scopeyou can configureSessions, which is very useful for accessing user information such as the registry, profile-contained information, etc. It should be noted that the script will be executed with the permission level that the user has, so if the user is not a local administrator, there will be certain limitations when acting at the system level.
-
-
When you want to display a message in the microservice output, it is recommended to use the cmdlet "Write-Output" instead of "Write-Host".
-
The output of the execution can be consulted in the details of the job generated during the execution.