Run microservices on a scheduled basis
Microservices are independent components that execute to prevent or solve frequent issues on devices, improve performance, or speed up tasks that might require a lot of time to do manually. They can be executed directly from the Workspaces module or scheduled from the Flows section in the Portal.
Schedule a microservice execution
-
Access
Portal->Flows. -
Click on
Newto create a new flow. Or select an existing flow if you want to modify it. -
Fill in the fields.
Overview
- Name. Name of the flow. The
Show languagesbutton allows you to write it in Spanish, English, Portuguese, Catalan, and Basque. - Description. Brief explanation about the purpose of the flow.
- Type. This is the scope of execution for the flow. Choose if it will be executed at the user session level, with the corresponding permissions, or at the device level, with administrative access.
- Reutilization time. Minimum time that will pass once the evaluated condition is met for the evaluation to be executed again.
- Detection only. If activated, it evaluates the conditions in "sampling" mode and detects the devices where these are met, but does not execute the microservice defined in the flow.
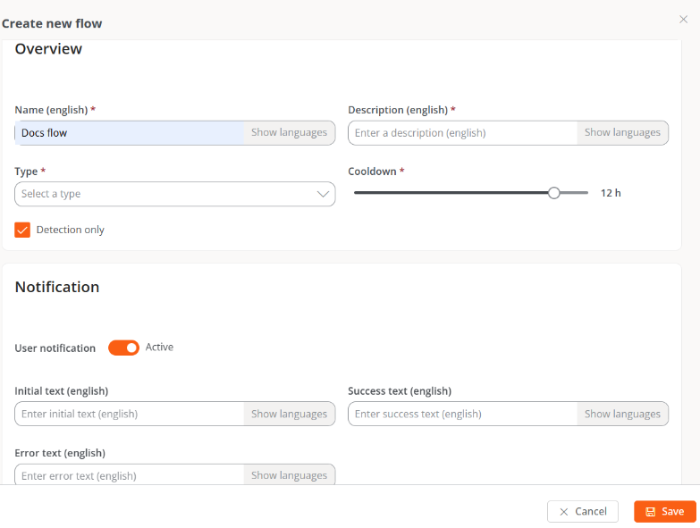
Notification
This parameter is optional and can be inactive. It is used to send notices to users at the start and end of flow execution using the operating system notifications. Once enabled, you can set:
- Initial text. Content of the notification that will be sent to users at the start of the execution.
- Success text. Content of the notification that will be sent to users after a successful execution.
- Error text. Content of the notification that will be sent to users after an execution with errors.
In all three fields, the
Show languagesbutton allows writing content in Spanish, English, Portuguese, Catalan, and Basque.Target
This section configures the flow's target. Through the
Apply todropdown, you can select the devices or groups where the actions will be executed.- All workspaces. Apply the flow to all devices in the organization.
- Workspaces. Apply the flow to the devices that the user chooses in the table.
- Workspaces groups. Apply the flow to the workspaces groups that the user chooses in the dropdown shown when selecting this option.
- Reporting groups. Apply the flow to the reporting groups that the user chooses in the dropdown shown when selecting this option.
- Name. Name of the flow. The
-
Once the fields are filled in, click on
Save. -
The user will be redirected to the flow's detail view. In the left sidebar menu, click on the
Flowtab. -
Click the
Editbutton located above the panel. -
In the panel, click on
+and then onAdd condition. A modal window with the available conditions will open on the right of the screen.
- Choose a condition.
- Fill in the verification fields.
- Click on
Save. - In the panel, click on the
+symbol located below the condition and selectAdd actionto add the microservice that will be scheduled. You can add more conditions at this point if necessary. - Select the microservice you want to schedule.
- Click on
Save. - To activate the flow, click on the
Enable flowbutton.
For more information, please check the documentation for Flows.