Flexxible Assist
Flexxible Assist is Flexxible's remote assistance solution. Allows operators to remotely connect to managed devices and sessions to perform support, diagnostics, and management tasks quickly and efficiently from the browser.
In addition to remote control, it includes features such as chat, file transfer, content sharing via clipboard, audio and video communication, administration tools, and artificial intelligence assistance.
Requirements
Agents
To use Flexxible Assist, the assisted device must have FlexxAgent Cross-Platform installed.
It must also have the Flexxible Assist agent, which is responsible for managing remote assistance connections. Its download and installation are done automatically when the feature is enabled at the organizational or reporting group level.
Once installed, the Flexxible Assist agent maintains a permanent connection with the service to enable the establishment of remote assistance sessions. It works alongside FlexxAgent Cross-Platform processes present on the device.
Supported operating systems
Flexxible Assist is compatible with the following operating systems:
-
Windows
- Windows 10, version 1809 or later
- Microsoft Windows Server 2019 or later
-
Linux
- Fedora 40 or later
- Ubuntu 22.04 or later
- Debian 12 or later
-
macOS
- macOS 15 or later
Security
Communications established during Flexxible Assist sessions are secured with end-to-end encryption. Flexxible does not have access to the keys required to decrypt the content exchanged between session participants.
Resource consumption
The Flexxible Assist agent requires approximately 30 MB of disk space.
When no remote assistance session is active, its consumption is approximately 7 MB of RAM and CPU usage is minimal.
During an active session, the consumption increases and may vary depending on the device's characteristics and the features used. Memory consumption can reach approximately 130 MB of RAM.
Settings
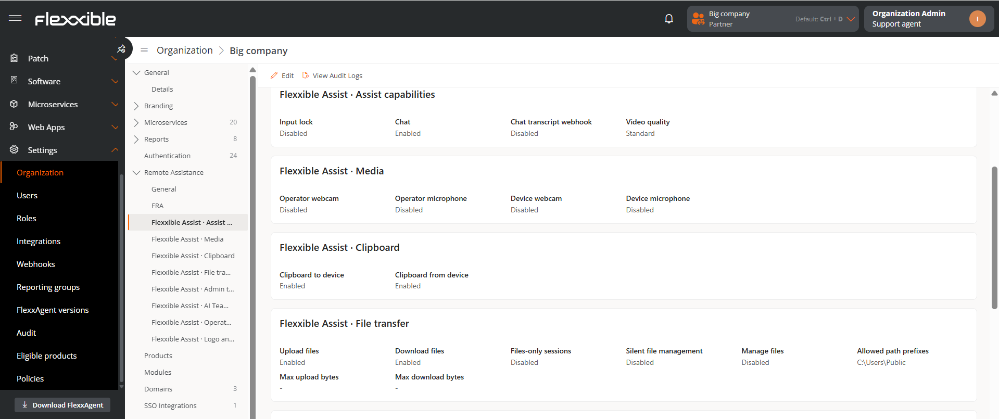
From the Remote Assistance tab in Organization, remote assistance can be configured at the organization or report group level.
Organization-level configuration
The organization-level configuration allows defining the general behavior of remote assistance.
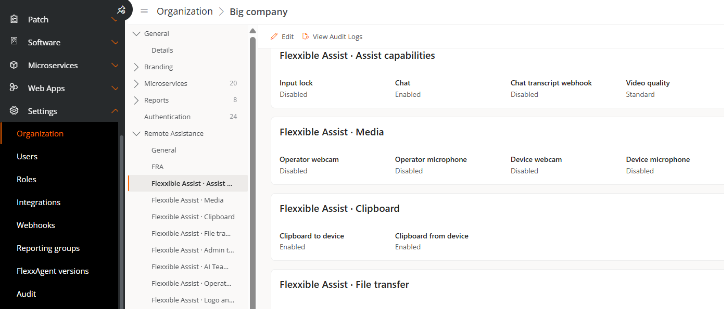
To enable and configure Flexxible Assist in an organization:
- Go to
Portal->Settings->Organization. - Select the
Remote Assistancetab. - Click the
Editbutton. - Select
Flexxible AssistinPreferred Technology. - Define the configuration according to the organization's needs.
- Click on
Save.
Reporting group-level configuration
It is also possible to establish specific configuration for a report group.
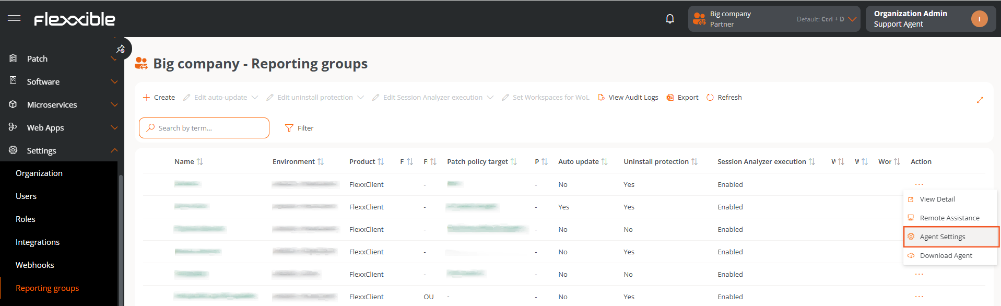
Reporting groups inherit the remote assistance configuration defined at the organizational level. When a specific configuration is set for a report group, it overrides the inherited configuration.
To enable and configure Flexxible Assist in a reporting group:
- Access
Portal->Settings->Reporting Group. - Locate the reporting group and in the
Actioncolumn click onRemote Assistance. - Select
Flexxible AssistinPreferred Technology. - Define the configuration according to the needs of the reporting group.
- Click on
Save.
Feature configuration
The configuration determines the remote assistance technology to be used —Flexxible Assist or Flexxible Remote Assistance (FRA)— and the functionalities that will be available during sessions.
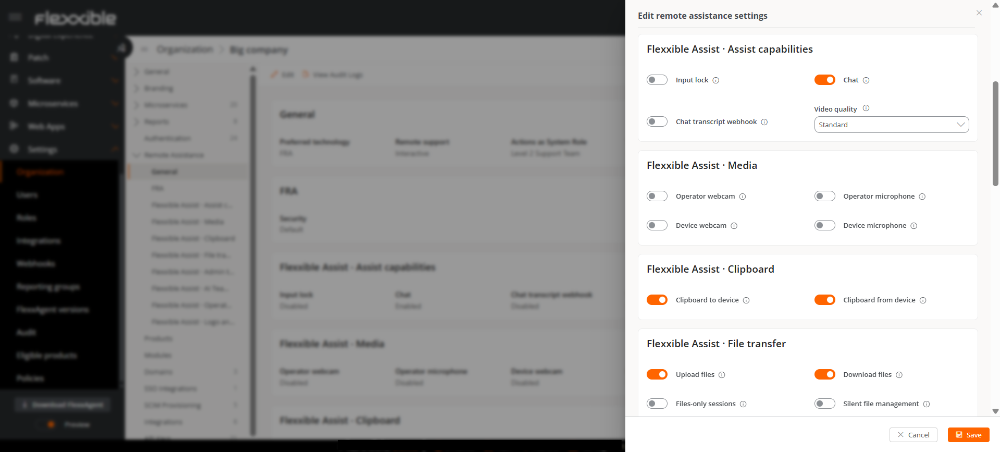
General
This section contains the general parameters related to remote assistance.
- Preferred technology. Defines the technology used for remote assistance connections. You can select Flexxible Remote Assistance (FRA) or Flexxible Assist.
- Remote Assistance. Defines the types of assistance that will be available to operators. The options are None, Dynamic, Interactive, and Interactive and Unattended.
- Actions as system role. In Flexxible Remote Assistance (FRA) type assistances, it defines which user role can start certain applications —CMD, PowerShell, Task Manager, Regedit, among others— as system user in the assisted session. Due to the privileges associated with these actions, it is recommended to restrict this capability to roles that truly need it.
- Technician display name. Defines how the technician is identified during Flexxible Assist-type assistance. The variables
[UserName],[Name],[LastName],[FullName],[NameWithInitial],[Initials], and[Department]can be used. If no value is specified, the technician's name, last name, and email will be shown as it appears in Portal. - Silent Unattended Assistance. When this feature is enabled, unattended remote assistance can be provided without displaying an in-progress assistance message on the screen. Useful on devices like kiosks or computers with sessions visible to the public.
Flexxible Remote Assistance (FRA)
This section allows defining the security model used. The available options are Default and Simplified Security. To know the differences between both options, consult Security in Flexxible Remote Assistance.
Flexxible Assist
This section contains specific options for Flexxible Assist.
1. Assistance Capabilities
- Entry Lock. Temporarily locks the assisted device's physical keyboard and mouse while the session is active.
- Chat. Enables text message exchange between the operator and the user during the session. Does not support sending images.
- Chat transcription. Logs the chat transcript when the session ends. It can be checked from Events in the registered operation Operations.
- Video Quality. Sets the preferred video quality for sessions. If a preference has been set in the operator's browser, it takes precedence. Available options: Low bandwidth, Standard, Crisp, or Ultra.
2. Medium
This section allows control over the use of cameras and microphones during sessions.
- Operator's Webcam. Enables the operator's camera feed to the assisted device.
- Operator's Microphone. Enables the operator's audio feed to the assisted device.
- Device's Webcam. Enables the assisted device's camera feed to the operator.
- Device's Microphone. Enables the audio captured by the assisted device to the operator.
3. Clipboard
This section controls content exchange between the operator's clipboard and the assisted device's clipboard.
- Clipboard to device. Enables transferring content from the operator's clipboard to the assisted device.
- Clipboard from device. Enables transferring content from the assisted device's clipboard to the operator.
4. File Transfer
This section defines the operations available for file transfer and management.
- Upload files. Enables file transfer from the operator's computer to the assisted device.
- Download files. Enables file transfer from the assisted device to the operator's computer.
- File only sessions. Enables sessions exclusively for file management without needing to establish a conventional remote assistance session.
- Silent file management. Enables file operations during silent sessions.
- Manage files. Enables the creation of folders, renaming, and deletion of files and folders. Deletions made through this functionality are permanent.
- Allowed path prefixes. Restricts file management to indicated paths. Up to 64 path prefixes can be defined. If none are specified, access to the entire file system is allowed.
- Maximum upload bytes. Sets the maximum size of each file that can be transferred to the assisted device. If the field is left empty, the default limit is 10 GiB. A value of 0 sets an unlimited size.
- Maximum download bytes. Sets the maximum size of each file that can be transferred from the assisted device. If the field is left empty, the default limit is 10 GiB. A value of 0 sets an unlimited size.
5. Admin Toolkit
Admin Toolkit is the Flexxible Assist functionality intended to execute tools and commands on the assisted device.
- Pre-defined tools. Enables access to administration tools available in Admin Toolkit.
- Run arbitrary commands. Enables the execution of custom commands on the assisted device.
6. Teammate
Teammate is the AI-based assistant integrated into Flexxible Assist. It can participate in a session with different levels of autonomy to observe activity, guide the operator, or perform actions.
Its behavior is controlled by the following parameters:
- Maximum Teammate mode. Sets the maximum authorized action level for the assistant. The available options are Observe, Guide and Act.
- Teammate execution command. Authorizes Teammate to execute commands on the assisted device.
- Automatic start of Teammate. Determines if the assistant should start automatically when establishing the connection and the mode it will use. The options available are Do not start automatically, Observe, or Guide. The selected mode cannot exceed the level set in Maximum Teammate mode. When automatic start is not configured, the operator can manually start the assistant during the session.
- Technician can deactivate Teammate. Determines if the operator can stop the assistant when it has started automatically. If the option is disabled, the operator cannot stop it during the session. This configuration only takes effect when an automatic start mode has been established.
7. Technician's Mark
This section allows customization of the texts shown to the assisted device's user during different moments of the session.
In all fields, the variable [TechnicianName] can be used. During the session, this variable will automatically be replaced by the technician's configured name. If not defined, the technician's first name, last name, and email will appear as they do in Portal.
The following texts can be customized:
- Consent title. Title shown when requesting user authorization to start assistance.
- Consent message. Text accompanying the authorization request.
- Panel title. Title shown on the assistance panel.
- Operator connected message. Message displayed when the operator establishes the connection.
- Blocked input message. Message displayed when keyboard and mouse of the device are locked.
- Chat legal notice. Legal text shown in the chat functionality.
8. Logo and icon
This section is only available in the organization-level configuration. Allows customization of graphical elements used in the remote assistance interface.
Different images can be configured for light and dark modes:
- Logo (light). Logo used with the light theme.
- Logo (dark). Logo used with the dark theme.
- Icon (light). Icon used with the light theme.
- Icon (dark). Icon used with the dark theme.
Types of remote assistance
Interactive (attended)
Interactive assistance allows the operator to connect to a device and take control of the user's active session.
This type of connection is oriented towards situations where the user is present and requires real-time support.
Interactive and Unattended
Interactive and unattended assistance allows the use of both interactive and unattended connections.
This type of assistance is particularly aimed at devices where user presence is not necessary, like servers or kiosks.
Dynamic
Dynamic assistance selects the type of connection based on the device's status:
If there is an active user session, interactive assistance is initiated.
If there are no active sessions, unattended assistance is initiated.
In this way, the operator can access the device regardless of an active session. In an unattended connection, they can also log in with other accounts without accessing user session data.
Execute a remote assistance
Flexxible Assist can be initiated from Workspaces or Sessions, allowing assistance to be set up in the context of a specific device or session.
To start a remote assistance:
- Access the Workspaces or Sessions view.
- Select a device or session to enter its detail view.
- Click on
Remote Assistance. - Select the type of remote assistance you wish to initiate.
- The connection is authorized, and a new browser tab opens with the Flexxible Assist session.
- Start the remote assistance from the new tab.
Operator screen
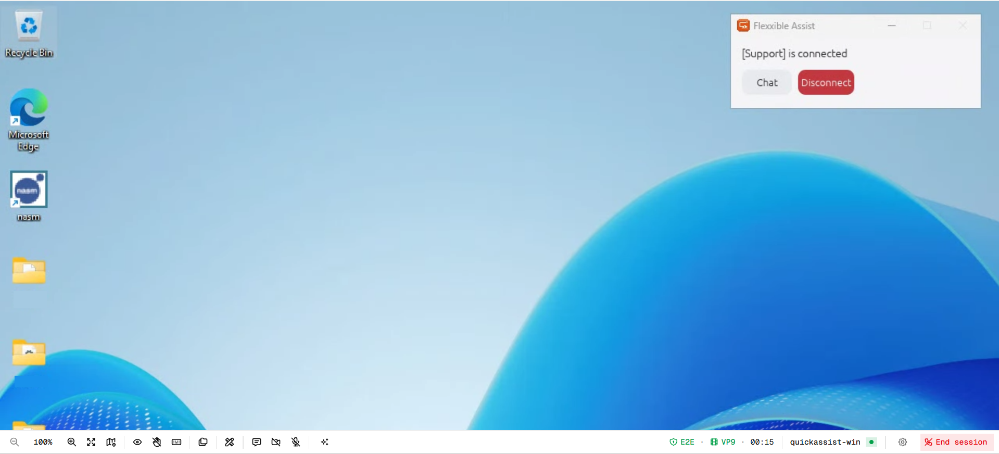
When starting remote assistance, a new tab opens in the operator's browser with the previously authorized session. Once the connection is established, the screen of the assisted device is displayed in the browser.
The interface provides access to session information, available functionalities, and connection configuration and control options.
Identification
In the top right corner, a panel shows the following elements:
- The corporate image set in Logo and Icon.
- The operator's name defined by Technician Display Name in General.
- A button to open the chat with the assisted device's user.
- A button to end the remote assistance session.
Features Menu
The available functionalities during the session are displayed with icons on the left side of the bottom bar. Their availability depends on the options enabled in Feature Configuration.

| Icon | Function | |
|---|---|---|
| Magnifying Glass | Increases or decreases the zoom level of the screen. | |
| Scaling | Adjusts the view of the assisted device's screen to the size available in the browser. | |
| Minimap | Displays a reduced view of the screen that can be moved to any corner. | |
| Preview | Allows the operator to indicate to the user where to click using a cursor identified with the operator's name, without taking direct action on the device. 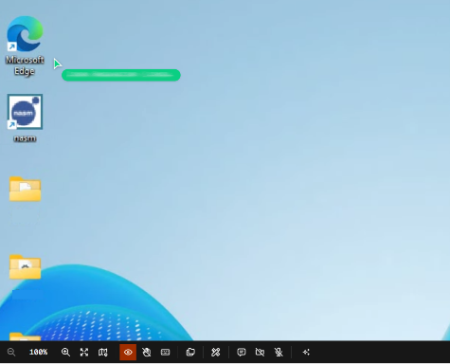 | |
| Block remote input | Temporarily blocks the user's keyboard and mouse. The operator continues to see the user's cursor position and retains control over the device. | |
| Keyboard | Sends key combinations to the assisted device, such as Ctrl + Alt + Del. | |
| File transfer | Opens tools for uploading, downloading, and managing files according to the configured paths and permissions. 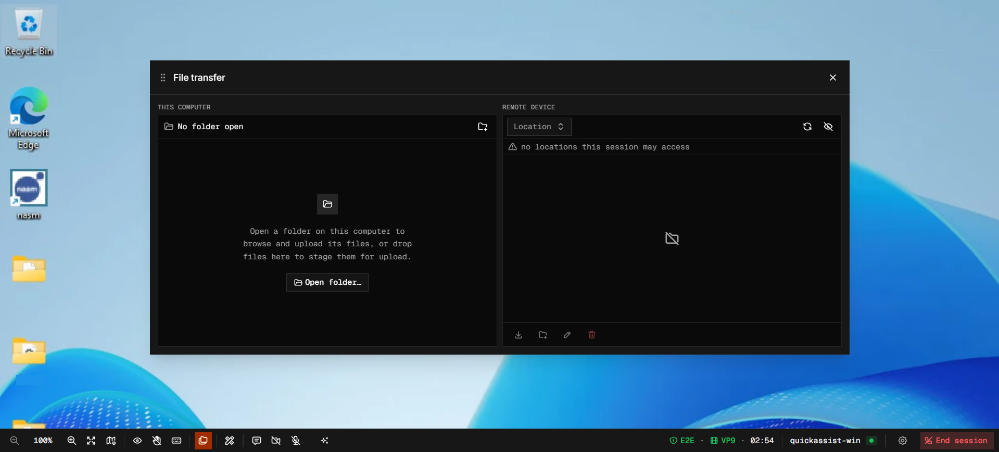 | |
| Admin Toolkit | Opens tools to execute commands and administrative actions on the assisted device. 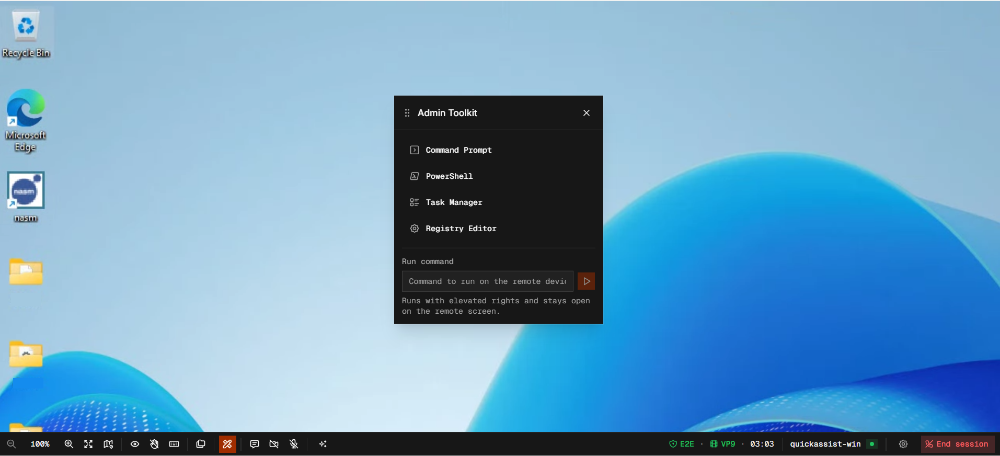 | |
| Chat | Opens a chat window to communicate with the user. | |
| Webcam | Manages communication using the operator's and assisted device's webcams. | |
| Start Microphone | Manages audio communication between the operator and the assisted device. | |
| Teammate | Opens the smart assistant Teammate. 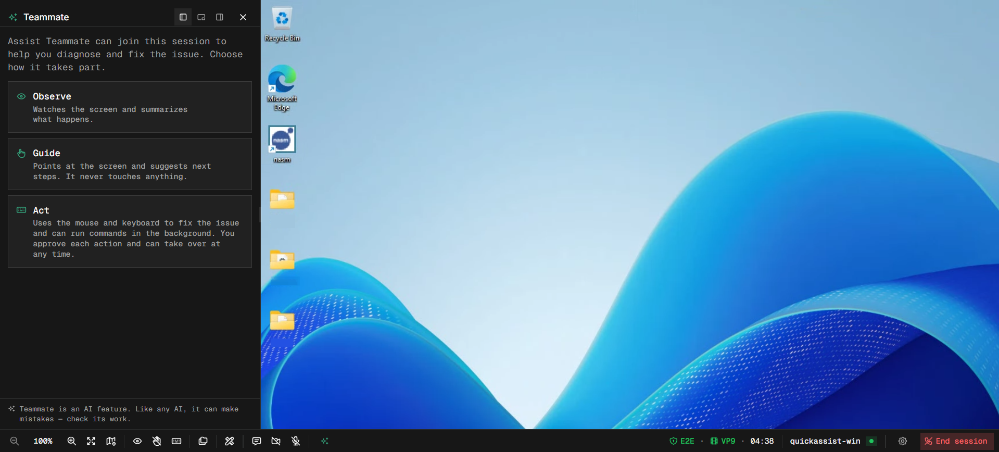 |
Status Menu
On the right side of the bottom bar, information about the connection status and session options is displayed:

- End-to-end encryption symbol
- Inactive (static) ms RTT
- Time elapsed since the connection started
- Workspace Name
- Settings
- Finish Session
Settings
The gear icon on the right of the bottom bar opens session configuration options.
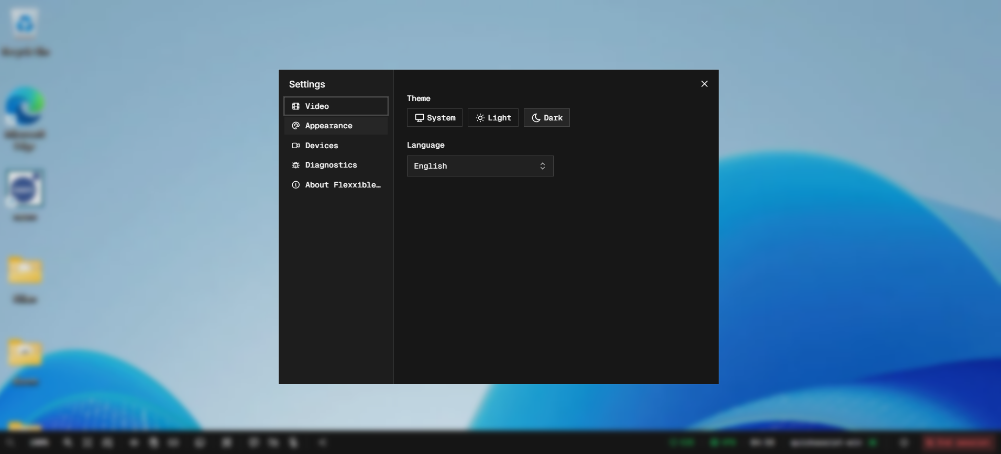
- Video. Controls video quality.
- Appearance. Allows selection of the system theme, light or dark, and configuration of the interface language.
- Devices. Contains options related to the webcam and microphone.
- Diagnostics. Shows technical information about connection quality and status.
- About Flexxible Assist Displays session identification information like the assisted device's name and session ID.
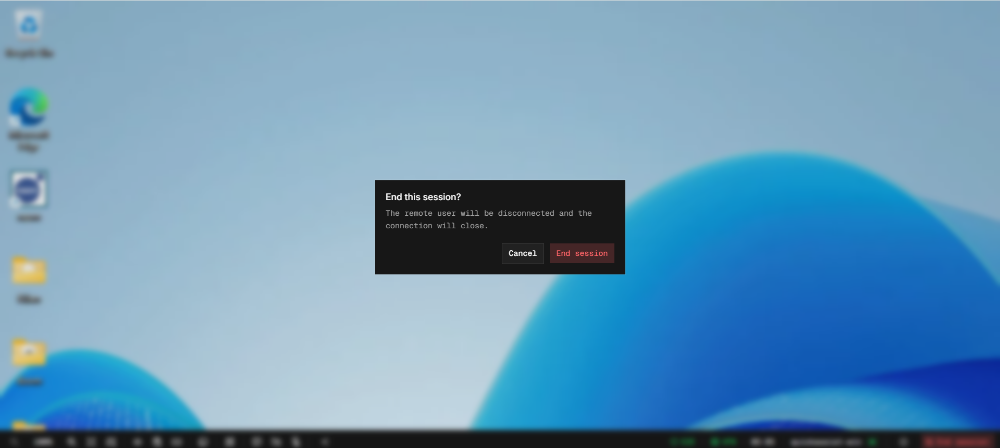
End Session
This option ends the remote assistance connection.
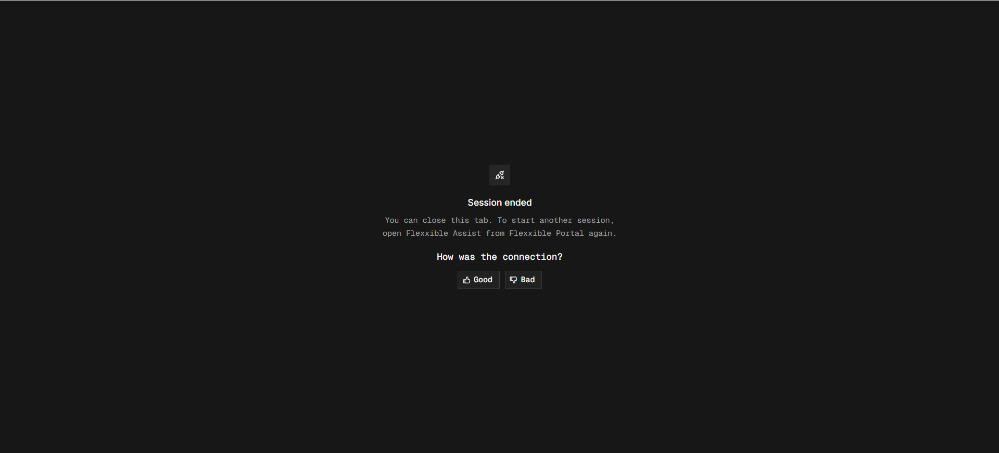
Once finished, the operator can rate connection quality.
Teammate Execution
Teammate is the AI-based assistant integrated into Flexxible Assist. During remote assistance, it can observe session activities, provide operator guidance, or perform actions based on autonomy level used.
It has three modes: Observe, Guide and Act.
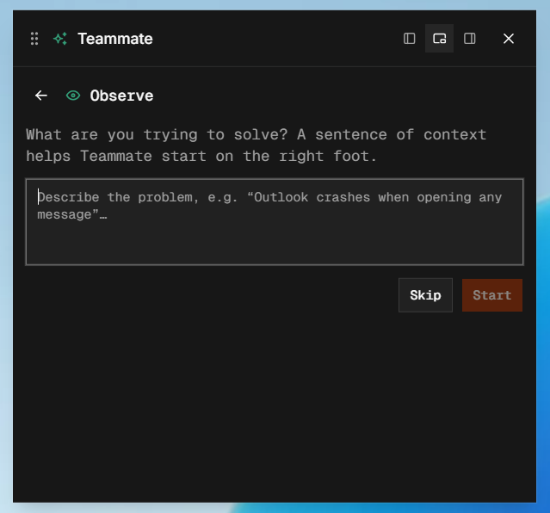
Observe
In Observe mode, Teammate analyzes activities during assistance without interfering with operator actions.
Upon session completion, it generates an assistance summary detailing the issue addressed, actions taken to resolve it, and intervention outcome.
The log allows subsequent review of what occurred during assistance without having participated in it.
Guide
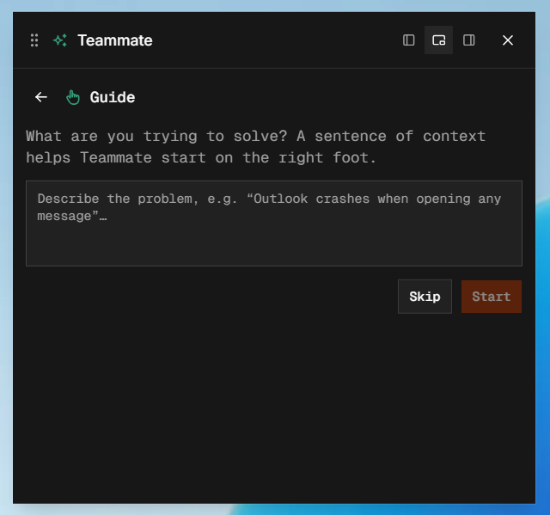
In Guide mode, the operator describes the incident they wish to resolve to Teammate. Based on this information, the assistant generates a work plan and provides instructions for resolution.
Teammate can analyze the same screen the operator views and indicate where to perform necessary actions. In this mode, the assistant guides the process, but the operator executes actions on the device.
Act
In Act mode, Teammate can directly execute actions on the device to resolve the issue described by the operator.
The operator specifies the problem that needs to be resolved, and Teammate can act autonomously within the capabilities enabled for the session.
Flexxible Assist Logs
At the end of a remote assistance session, Flexxible Assist logs in Operations the actions and events generated during the connection.
This log allows for later consultation of the activity carried out during the assistance and provides a history of the actions performed.